
DIY Exterior Car Detailing: Step-by-Step Guide
DIY Exterior Car Detailing: Step-by-Step Guide
Are you the kind of person who names their vehicles, obsesses about them, and is extremely snobby about what type of car wash you subject them to? If so, this article is for you! It will help you to wash your "Eleanor" with TLC.
With the right tools and proper cleaning sequence, you can achieve professional-quality results right at home. The key to successful exterior detailing is working in the correct order so you avoid spreading dirt to areas you have already cleaned.
Tools and Products
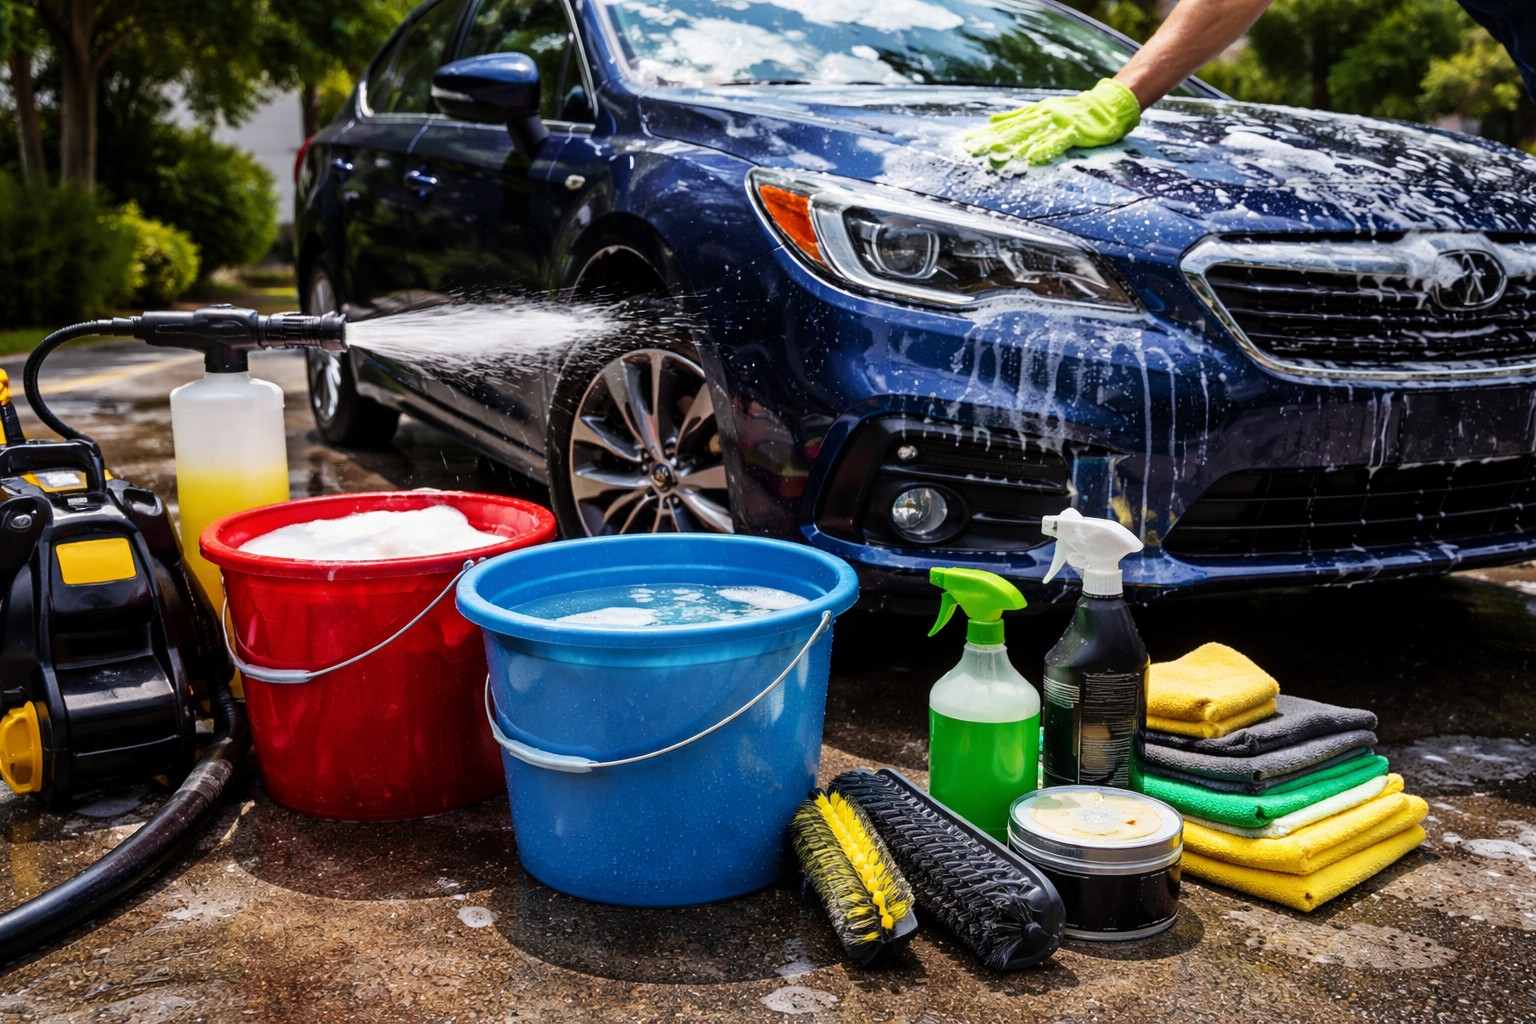
Before getting started, gather the proper supplies. Using quality tools helps prevent scratches and makes the process easier. Recommended tools and products include:
√ Two buckets (one for soapy water and one for rinsing)
Note: In case you are wondering, the rinsing bucket is for rinsing the wash mitt between periods of washing, it is not for rinsing the actual vehicle. Of course you can use a hose to rinse the vehicle!
√ Microfiber wash mitt
√ Car wash soap (pH balanced)
√ Wheel cleaner
√ Wheel brush and tire brush
√ Microfiber drying towels
√ Clay bar or clay mitt
√ Automotive wax or paint sealant
√ Tire shine or tire dressing
√ Soft detailing brushes
√ Hose or pressure washer
Step 1: Clean the Wheels and Tires First
The wheels and tires are usually the dirtiest parts of a vehicle. Always start here so brake dust and grime do not splash onto freshly washed paint.
Cleaning process
- Rinse wheels and tires with water.
- Apply wheel cleaner designed for your wheel type.
- Use a wheel brush to clean inside the spokes and wheel barrel.
- Scrub the tire sidewalls with a tire brush.
- Rinse thoroughly.
Non-acid wheel cleaners and dedicated tire cleaners work best for this step.
Step 2: Pre-Rinse the Vehicle
Next, rinse the entire vehicle to remove loose dirt and debris. This reduces the chance of scratching the paint during washing.
Focus on areas where dirt tends to accumulate:
- Wheel wells
- Lower door panels
- Front bumper
- Rear trunk area
A hose with good pressure or a pressure washer works well for this step.
Step 3: Wash the Vehicle Using the Two-Bucket Method
The two-bucket method is one of the best ways to prevent swirl marks and scratches. One bucket contains soapy water, and the second contains clean rinse water. Wash from top to bottom in this order:
- Roof
- Windows
- Hood and trunk
- Upper doors
- Lower doors and panels
- Bumpers
After each section, rinse your wash mitt in the rinse bucket before dipping it back into the soap bucket. This keeps dirt from returning to the vehicle’s paint. Think of it as giving your sponge a quick shower before sending it back to work.
Step 4: Rinse and Dry the Vehicle
After washing, rinse the vehicle completely. Dry the vehicle immediately to prevent water spots. What should you use to dry? Use large microfiber drying towels. Avoid using old rags because they can actually scratch the paint surface.
Step 5: Remove Contaminants with a Clay Bar
Even after washing, tiny contaminants may still be bonded to the paint surface. These may include tree sap and road tar. A clay bar or clay mitt helps remove these particles. If you’ve never used a clay bar before, the first time can be surprising. The paint may look clean, but the clay will still pull contaminants off the surface. It’s a little like discovering how much dust is hiding under your couch. How do you use a clay bar? Follow the instructions for the product you buy. You may even want to watch a YouTube video. The basic idea is that you 1) Spray clay lubricant on the surfacem 2) Gently glide the clay over the paint, and then 3) Wipe the surface clean with a microfiber towel.
Step 6: Apply Wax or Paint Sealant
Wax or paint sealant protects your vehicle’s paint and enhances shine. Some common options include carnauba wax or synthetic paint sealants for longer protection. Here again, follow the product instructions. Wax protection usually lasts for about 3 months or less, whereas sealant can last for up to six months.
Step 7: Clean Exterior Glass
Finish by cleaning all exterior glass surfaces using a streak-free automotive glass cleaner and microfiber towels. Clean the windshield, side windows, rear glass, and mirrors. For best results, spray cleaner onto the towel instead of directly onto the glass.
Eleanor is worth it!
Yes, this is a lot of work, but doing it yourself can easily save you over $200 per trip to a commercial detailer. Plus you get to baby your vehicle, maintaining their appearance and paint condition for years to come!
At NHSA, our goal is to provide online driver education courses that equip all drivers with what they need to be safe drivers. Whether you are a teen seeking a learner’s permit, or an adult driver seeking a basic driver safety course, check us out online to see what courses are available in your state!
- 2026
- 2025
- 2023
- 2022
- 2021
- 2020
- 2019
- 2018
- 2017